Back-to-school season often comes with rushed mornings, picky eaters, and the eternal question: What should I pack for lunch today? Instead of scrambling at the last minute, sandwich kits for kids make weekday lunches easy, fun, and even something they look forward to.
In this blog post, we’ll cover everything you need to build DIY sandwich kits that are kid-friendly, mess-free, and perfect for school lunchboxes.

Whether your child has dietary restrictions, loves variety, or just wants a fun lunch—they’ll love these no-heat, build-your-own sandwich ideas.
Also Read: 12 Immune-Boosting Foods & Tips for Moms: Keep Your Family Healthy And Funny In Easy Way
Why DIY Sandwich Kits Work for Kids
Let’s start with why this method works so well.
- ✅ Kid choice: Children love having options. Sandwich kits give them that sense of control.
- ✅ Balanced nutrition: You can sneak in fruits, veggies, proteins, and whole grains in small portions.
- ✅ Time-saving: With a little weekend prep, you can create lunch kits for the entire week.
- ✅ No soggy sandwiches: Kids assemble them fresh during lunch—no more soggy bread.
Essential Items for Your Sandwich Kit
To create your own lunchbox sandwich kits, you’ll want to break it down into components. This helps you batch prep and mix-and-match throughout the week.
1. Sandwich Bases
Keep a few varieties ready so kids don’t get bored.
- Whole wheat sandwich bread (cut into fun shapes)
- Mini slider buns or soft dinner rolls
- Gluten-free sandwich thins or wraps
- Pita pockets or tortillas
Prep Tip:
Pre-slice and freeze different types of bread at the start of the week. Defrost each morning or overnight for fresh-feeling slices.
2. Proteins
Protein keeps kids full and focused. Aim for lean, non-messy options.
- Sliced turkey or chicken breast
- Paneer cubes (for vegetarian kits)
- Hummus or chickpea mash
- Hard-boiled egg slices
- Cheese slices or sticks
Prep Tip:
Pre-cook and refrigerate proteins in airtight containers. Portion into small reusable cups or bento boxes.
3. Veggie Fillers
Pack colorful veggies that are crisp, hydrating, and easy to bite.
- Shredded lettuce or baby spinach
- Cucumber rounds
- Grated carrots
- Tomato slices (pat dry to avoid sogginess)
Prep Tip:
Pre-chop veggies and wrap in paper towels before placing in snack bags or silicone containers to keep them fresh.
4. Spreads and Sauces
Add flavor and fun with simple spreads.
- Mayo or mustard (in mini squeeze bottles)
- Ranch or Greek yogurt dip
- Nut-free pesto
- Avocado mash (with a dash of lemon)
Prep Tip:
Use small dressing containers or silicone muffin cups to prevent soggy sandwiches.
5. Sides and Snacks
Add easy-to-grab sides that pair well with the sandwich kit.
- Fresh fruit (apple slices, grapes, or banana halves)
- Trail mix or pretzels
- Mini cookies or granola bars
- Yogurt pouches
Sample Sandwich Kit Themes
Now let’s take this up a notch. Try themed sandwich kits to keep things exciting!
🎒 Back-to-School Sandwich Kit
Main: Whole wheat sandwich bread + turkey slices + cheddar
Veggies: Lettuce and tomato
Spread: Mayo
Sides: Grapes and pretzels
Note: Include a tiny back-to-school message card for a sweet touch.
🌯 No-Heat Wrap Kit (No Microwave Needed)
Main: Gluten-free tortilla + hummus + grated carrots + spinach
Sides: Apple slices with cinnamon + oat cookie
Tips: Add a mini spoon for spreading and rolling instructions for younger kids.
🌾 Gluten-Free Sandwich Kit
Main: Gluten-free sandwich thins + grilled paneer + cucumber slices
Spread: Nut-free pesto
Sides: Dried fruit and seed mix + dairy-free yogurt
🎨 Rainbow Sandwich Kit
Main: Slider buns + chicken strips + rainbow veggies (carrots, spinach, purple cabbage)
Sides: Strawberries and multigrain crackers
Fun Add-On: Include a mini color checklist for “Eat the Rainbow!”
🌎 Travel-Themed Sandwich Kit
Main: Pita bread + falafel + cucumber + tzatziki dip
Sides: Hummus and pita chips + orange wedges
Label it: “Mediterranean Monday” or “Lunch Trip to Greece”
Kid-Friendly Prep Routine (Weekend Edition)
Want to save time during the week? Here’s a simple routine to follow every Sunday:
- Choose your themes: Plan 3–4 sandwich kits for the week.
- Slice and store: Prep all veggies and protein in separate containers.
- Portion spreads and sides: Use reusable silicone cups or small containers.
- Assemble kits in sections: Keep each item separated to maintain freshness.
- Refrigerate and grab-n-go: Each night, pack one kit per lunchbox.
How to Make It Fun for Kids
Even the best sandwich can flop if it’s boring. Here’s how to keep lunch fun:
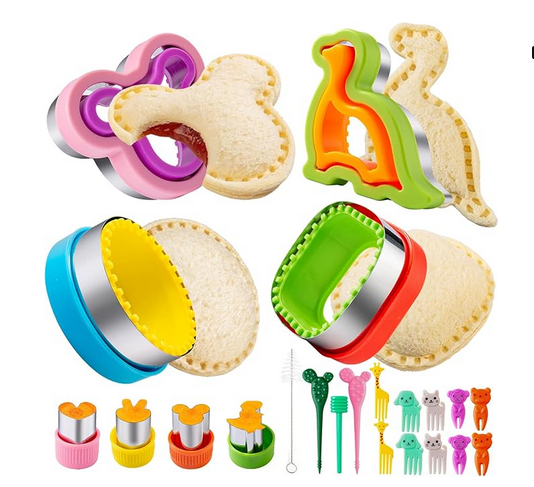
- Use cookie cutters for bread and cheese
- Let kids choose their own fillings from a prepped tray
- Color code containers or use themed stickers for each day
- Include a small treat or “lunch note” every now and then
Frequently Asked Questions (FAQs)
Q: How long do sandwich kit components stay fresh?
A: Veggies and proteins will last 3–4 days when stored separately in airtight containers. Bread can be frozen and thawed as needed.
Q: What if my child doesn’t like sandwiches every day?
A: Switch it up with wraps, pita pockets, or deconstructed “DIY cracker sandwiches” using cheese and meats.
Q: Are these kits suitable for picky eaters?
A: Yes! Because kids assemble the sandwich themselves, they’re more likely to eat it. Keep portions small and offer two veggie options to choose from.
Final Thoughts
With just a bit of planning, these easy DIY sandwich kits can make your school mornings smoother, your kids’ lunches healthier, and their lunchboxes a lot more exciting.
Whether you’re dealing with picky eaters, food allergies, or just a packed schedule, this system works. Give a few of these themed kits a try and watch lunch prep turn from stressful to simple.
